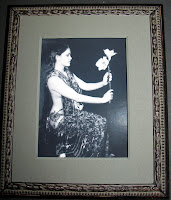
We selected materials and decided on a reverse-fillet moulding and tiny 1/2" exposure on a gray museum rag mat.
I had only ever done reverse-fillets on items going inside some larger frame like a shadowbox collage, but was certain I could figure out how to do one that would be its own frame. I would come up with a solution on the fitting table (where else?)
2 weeks later, when the materials had arrived and I had some time to work it out, it dawned on me that reverse-fillet contruction has no rabbet to hold the glass in place and we had definitely agreed upon glazing. I could fit it in under the mat, but there is so little depth inside that the glass would have to be in direct contact with the photo. Also unacceptable (both to the client and against the framing oath). I slept on it and came up with a beautifully simple solution.
The first step was to cut and join the fillet. Fillet was joined in the vice with some amazing new adhesive I've discovered. Then the gray top mat was cut with reverse bevels on the ouside and adhered to fillet inset. Conservation Clear glass was cut to inner dimension of fillet. Then I decided to try to cut another museum mat with a larger opening to fit under the glass, but on top of the photo to be a platform for the glass to rest on. The exposure on this mat was a tiny 1/4" so it was really tricky--outsides had to be trimmed after the fact and extreme care not to overcut to maintain shape integrity. But the mat turned out to be too thick to fit inside with the glass and the art (only about 3/16" clearance--glass is 1/8"). So what's a girl to do?
 Then the gray top mat was cut with reverse bevels on the ouside and adhered to fillet inset. Conservation Clear glass was cut to inner dimension of fillet. Then I decided to try to cut another museum mat with a larger opening to fit under the glass, but on top of the photo to be a platform for the glass to rest on. The exposure on this mat was a tiny 1/4" so it was really tricky--outsides had to be trimmed after the fact and extreme care not to overcut to maintain shape integrity. But the mat turned out to be too thick to fit inside with the glass and the art (only about 3/16" clearance--glass is 1/8"). So what's a girl to do?

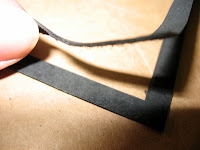
I just peeled off the top layer! Normally this would not be enough surface area to ensure no glazing contact with the art, but the subject is only 3 x 4" wide! It worked! So simple!
Then I cut a nice suede backing with bevels on the outside to cover the whole back of the project. I mounted to photo to the backing, and adhered the backing to the back of the fillet. Voila!
Then I cut a nice suede backing with bevels on the outside to cover the whole back of the project. I mounted to photo to the backing, and adhered the backing to the back of the fillet. Voila!


No comments:
Post a Comment