Wednesday, February 25, 2009

And the award goes to...

Part Three in my week long series on Frames and Film

In honor of the Academy Awards last Sunday and the stress of the rush movie job being over (there's still more to come, just at a more leisurely pace), I give you now my top 5 framing movies. Oh yes, there are some great moments in framing on film.

5. John Waters' Pecker (1998). There is a wonderful scene where Pecker has his first photography exhibit in a Baltimore sandwich shop. The framing is AWFUL and obviously done by the artist who has no formal framing education. Outsider framing. The frames are garage-sale finds and the glass doesn't fit so newspaper is wedged at the top and bottom to hold things together. If I had more time on my hands I would do a screen-cap from my signed copy. I love how John Waters can even make framing hysterically funny. I reference this scene all the time at the shop when art students get sticker-shock and look for alternatives.

4. How to Steal A Million (1966) starring Audrey Hepburn and Peter O'Toole. This is a comedy about art forgery and thievery shot on location in Paris in glamorous mansions and museums. The frames are gorgeous and tacky in a fabulous 60s way. Worth watching for the art direction alone, but also there's Audrey in her Givenchy wardrobe, too.

3. Vertigo (1958) Jimmy Stewart and Kim Novak star in this Hitchcock classic. In one of the beginning scenes, Kim Novak arrives home after having been to the framer's. Her parcel is enormous and covered in brown kraft paper. I am from modest beginnings, so this was the first time I had ever seen someone return from a frame shop and the package looked very elegant to me! There are some later scenes in an art museum which also contain some nice frames, but the kraft paper wrapped parcel is what has stuck with me through the years.

2. Unbreakable (2000). Philadelphia's own M. Night Shyamalan directs a second picture with Bruce Willis and great framing. There is a scene in Samuel L. Jackson's lair that includes dozens of gallery-style images of superheroes. I worked in a very well-staffed frame shop at the time this film was released (I had not yet come to Philly or Frugal Frames) and this scene influenced some of my colleagues and our designs. It also led to our hypothesis that M. Night Shyamalan might have at one time been a framer himself.

1. The Sixth Sense (1999). One cannot discuss frames on film without mentioning this, M. Night Shyamalan's first feature film. There are lines of dialogue in at least two scenes that talk about how stunning a particular piece of framing is, which may be unprecedented in film. Again, I would screen-cap if I could. The frame is a Stradivarius veneer, and back in the day I sold it to customers as "The Sixth Sense" frame, unaware that eight years later I would work in the shop that created it.


Here's the Stradivarius and photo of the newspaper article (sorry, it's not archived online--just click to enlarge). And go figure, Frugal Frames on Pine Street also did 100 pieces for that great scene in Unbreakable, too.


Tuesday, February 24, 2009

Action!

Part Two in my week long series on Frames and Film

So today is Tuesday and the day the balance of the frames were to arrive for the big movie order, but there was yet another comedy of errors (again, I am blameless for real) and they nearly did not. At some point during this very frantic morning I even contemplated buying ready-made frames at a craft store just to deliver the job on time. (And did I mention it's my birthday today?) Sidenote: when the order was placed I suggested to the Set Decorator that we put everything in standard sizes, so the rectangles would look proportionate on film and also so that maybe they could be recycled after the shoot. These very practical objectives gave me more options today when things started to go awry. The job would be delivered somehow, because it sure would be nice to work in film in this town again.

Through some sort of magic (read: very "assertive" phone calls from the Boss), the frames arrived at noon. Since I had everything prepped including glass, it was really just a simple matter of fitting and I had all pieces complete by 1:10 pm--just 10 minutes over schedule and I was not seen to break a sweat.

Here are the remaining frames completed today. And for getting this order in on time...


I'd like to thank all the little people who got me here.

Monday, February 23, 2009

I oughta be in pictures...

Part One in my week long series on Frames and Film

Last week a Set Decorator for a major motion picture bounded into the shop with tubes and bags and sleeves of art under her arm. This is the second time I have assisted a Set Decorator (though several have been through the shop over the years). Each needed the completed projects in less than a week, and each competently made decisions with me while simultaneously handled various calls on her cell phone. Amazing.

This time it was 20 pieces, 15 of which were needed for Tuesday (it was Friday at noon). No problem. I would receive frames and mats Monday morning and have them completed for the Tuesday deadline.

So, today is Monday. There was some sort of mix-up at the distributor (the ordering was done right on our end, fyi), and only half the frames arrived. After some calls were made (thanks Mark & Alexa!) the others are sure to arrive tomorrow, and I am certain I can still pull it off by 1:00 pm.
And as is often the case, when it rains it pours. Feast or famine. Or by whatever cliche you like, I had a gazillion other things to occupy my time today, like framing a whole gallery show which I cannot show you just now, and 7 documents for the hospital (right).

Here are the first 7 completed pieces for the movie (left). Maybe they'll make their film debut or maybe they'll end up on the cutting room floor. Oh and some things I learned about framing for film is that one should not frame with stark white mats--they look too harsh on film. We selected a nice off-white here. Also, ALWAYS use non-glare glass to stand up to the lighting. And since the frames and art are ostensibly props and likely to be thrown out, auctioned off, or given as souvenirs, there is no need for conservation glazing and permanent mounting techniques can be used.

Sunday, February 22, 2009

proper proportion

I just wanted to make a quick note today regarding proportion. Many clients get scared when I suggest wide mouldings for their art. The fear is that the moulding will overpower the art and be a distraction. This week I can exhibit an example of modern frame proportion.
The image here is 20 x 24" and the moulding width is 4." Rather than detracting from the art, this moulding elevates and enhances the art, displaying it as the substantial work that it is. And it doesn't hurt that the moulding is a gorgeous "Belmont" veneer from Larson-Juhl.

Saturday, February 21, 2009

One Man's Trash


A new client appeared in the shop and unfurled five stunning original vintage travel posters. They were in prisitne linen-backed condtion and wonderfully oversized. I have seen hundreds of vintage reproduction travel posters in my career, but I had never seen these particular images. My client explained that he grew up in a town where there was an elderly travel agent. After he died, the travel agent's sons cleaned out his office and put some office furniture out for the trash. My client, then in college, was in need of a desk and the one on the curb looked ok. Once he got it home he discovered the posters in the drawers. He held onto them and later in life had them appraised. They were all orignials and worth quite a tidy sum! He had just had them linen-backed when he arrived in the store.


We selected materials, 8 ply mats with 3" exposures on all. The frames on some are matte black with Conservation Clear glass, and the remaining frames are espresso burl with Museum glass, lest they be mistaken for garbage again.

The large format posters are roughly 40 x 52" finished.

Wednesday, February 18, 2009

steampunk ingenuity

When one of Philly's most fabulous photographers, Tsirkus Fotografika, came to me and asked me to try to create a daugerreotype-inspired enclosure for one of his gorgeous original polaroids, I said, "yes," without hesitation.

We selected materials and decided on a reverse-fillet moulding and tiny 1/2" exposure on a gray museum rag mat.

I had only ever done reverse-fillets on items going inside some larger frame like a shadowbox collage, but was certain I could figure out how to do one that would be its own frame. I would come up with a solution on the fitting table (where else?)

2 weeks later, when the materials had arrived and I had some time to work it out, it dawned on me that reverse-fillet contruction has no rabbet to hold the glass in place and we had definitely agreed upon glazing. I could fit it in under the mat, but there is so little depth inside that the glass would have to be in direct contact with the photo. Also unacceptable (both to the client and against the framing oath). I slept on it and came up with a beautifully simple solution.

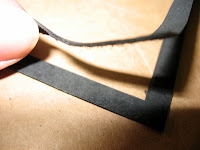
The first step was to cut and join the fillet. Fillet was joined in the vice with some amazing new adhesive I've discovered. Then the gray top mat was cut with reverse bevels on the ouside and adhered to fillet inset. Conservation Clear glass was cut to inner dimension of fillet. Then I decided to try to cut another museum mat with a larger opening to fit under the glass, but on top of the photo to be a platform for the glass to rest on. The exposure on this mat was a tiny 1/4" so it was really tricky--outsides had to be trimmed after the fact and extreme care not to overcut to maintain shape integrity. But the mat turned out to be too thick to fit inside with the glass and the art (only about 3/16" clearance--glass is 1/8"). So what's a girl to do?

I just peeled off the top layer! Normally this would not be enough surface area to ensure no glazing contact with the art, but the subject is only 3 x 4" wide! It worked! So simple!

Then I cut a nice suede backing with bevels on the outside to cover the whole back of the project. I mounted to photo to the backing, and adhered the backing to the back of the fillet. Voila!